Welcome! Photoshop can be a very intimidating program when you don't know where to begin... I created this blog to hopefully help people who need a basic starting point for their editing workflow. These tutorials were created in Photoshop CS3 but Elements users should be able to follow them as well. I hope they are helpful! :c)
Tuesday, October 16, 2007
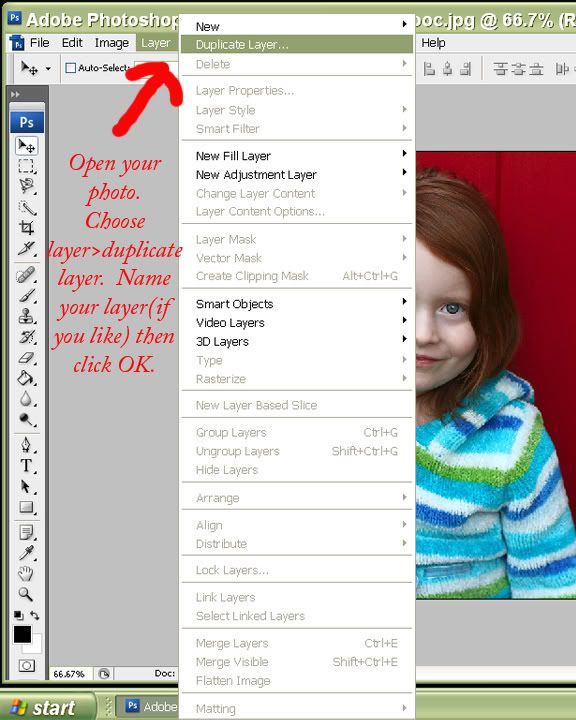
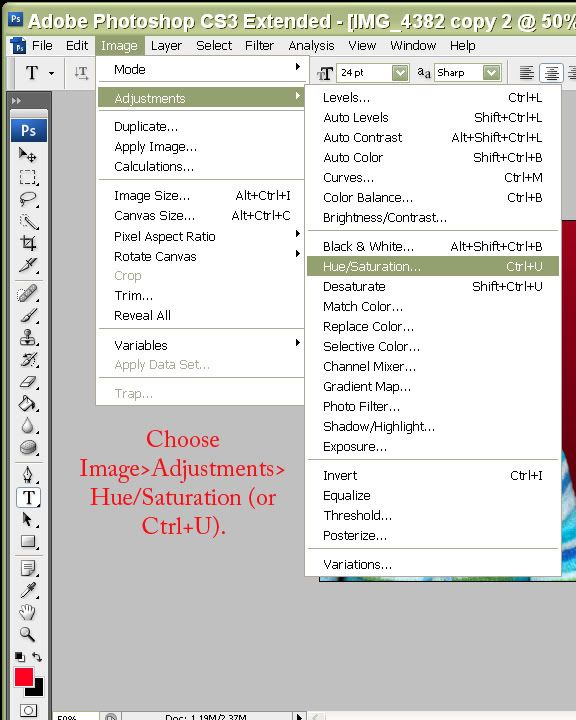
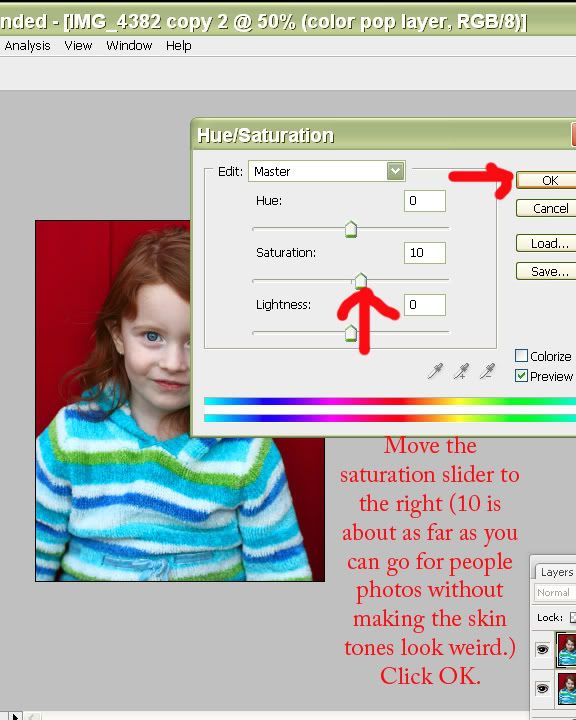
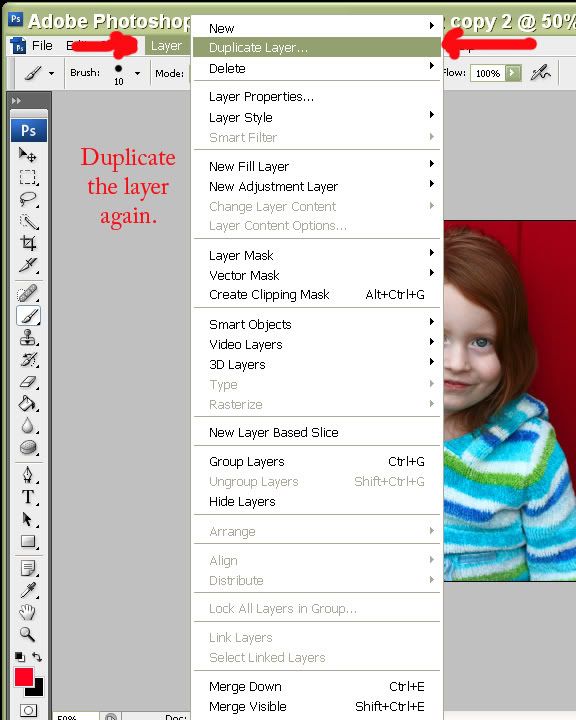
A basic color pop tutorial
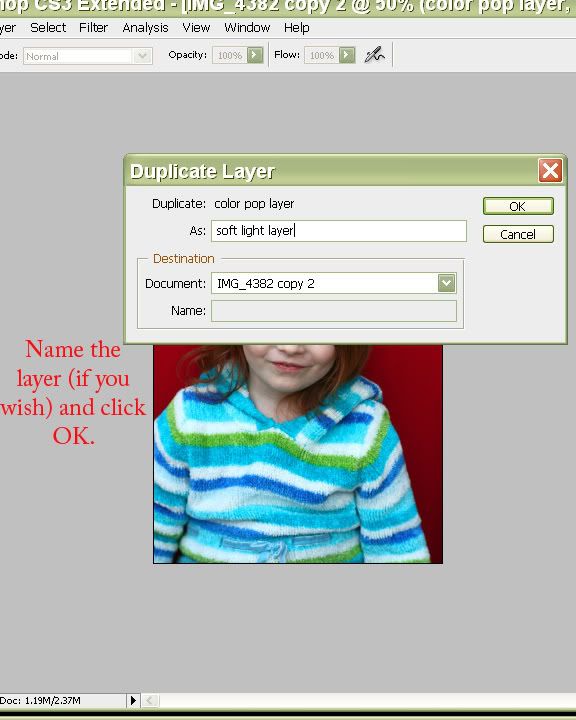
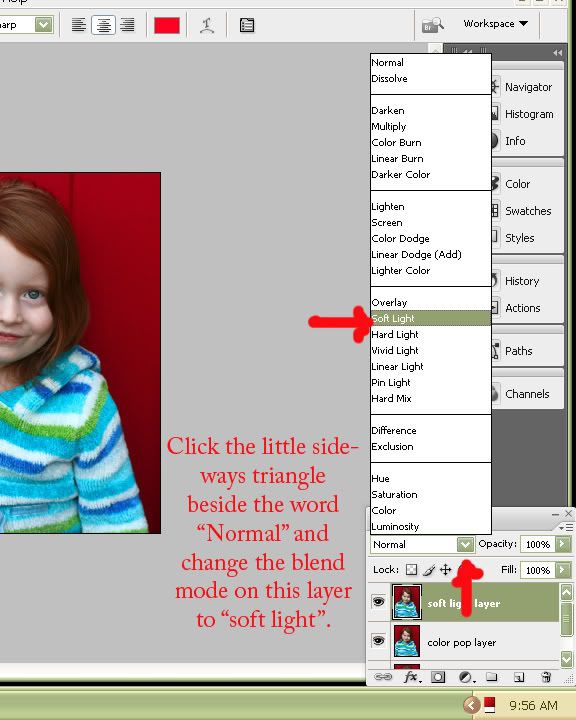
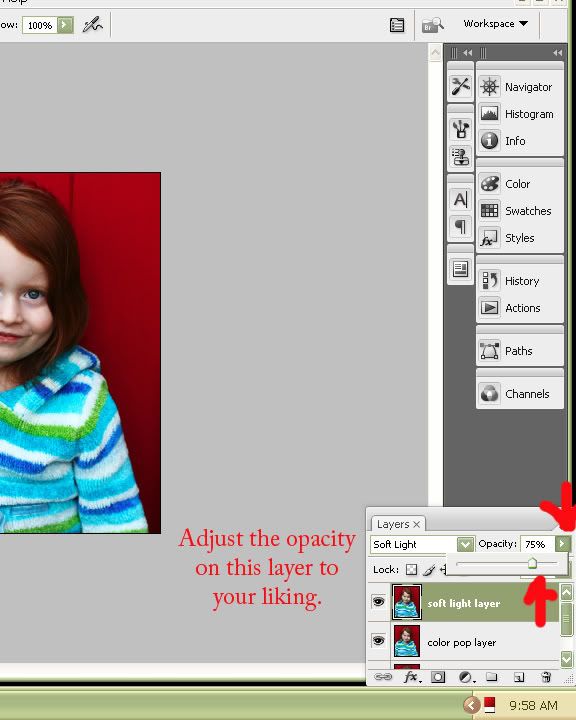
Now just merge or flatten your layers (Ctrl+alt+e to merge layers) and apply your regular sharpening and save your color popped image! :c)
I am a busy mom that so wants to learn more about photography and my hubby lives in photoshop for work but this quick and simple step-by-step is awesome! THANK YOU!!!
2 comments:
I am a busy mom that so wants to learn more about photography and my hubby lives in photoshop for work but this quick and simple step-by-step is awesome! THANK YOU!!!
As someone using Elements, I didn't think I could ever get this awesome "color pop" look. Thank you, thank you, THANK YOU for showing us how!!!
Post a Comment