Thursday, January 15, 2009

Quick and easy color correction

I will start off with the disclaimer that I did NOT come up with this method... the genius who did is named Dave Cross and he is a photoshop MASTER.

I will walk you through first finding the midtone gray in any image, then the super simple way to color correct with just one click! :)

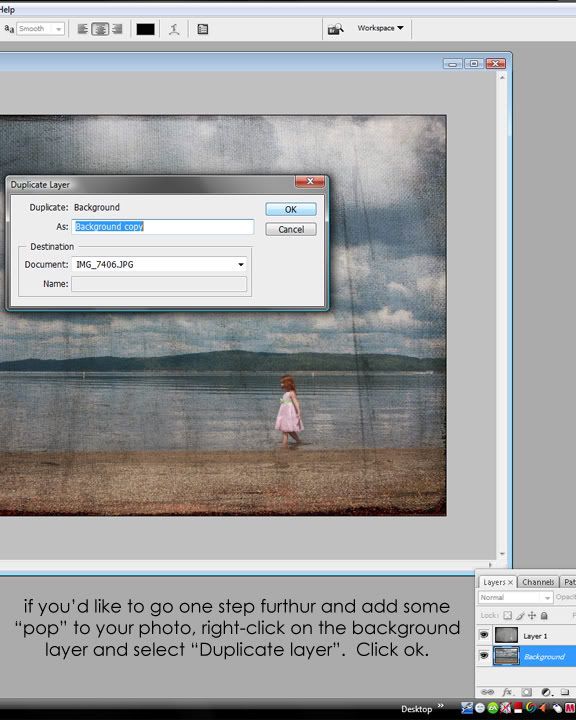
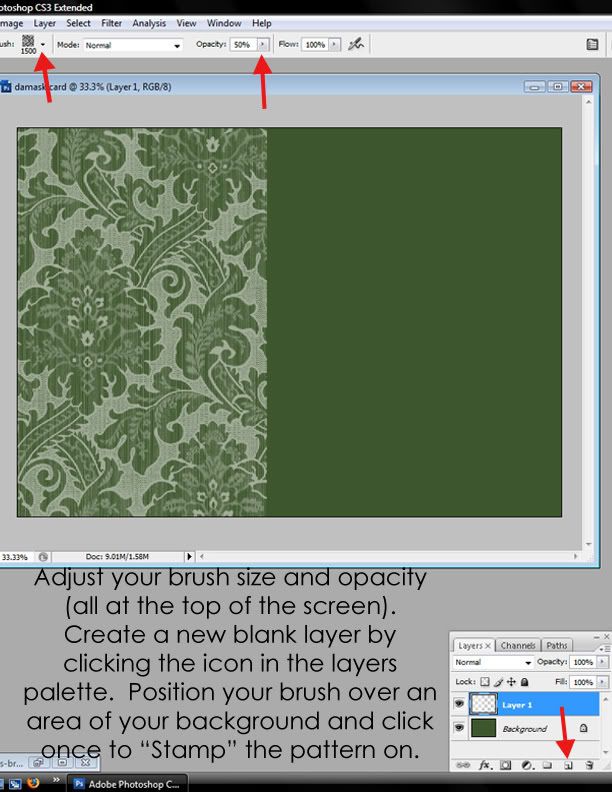
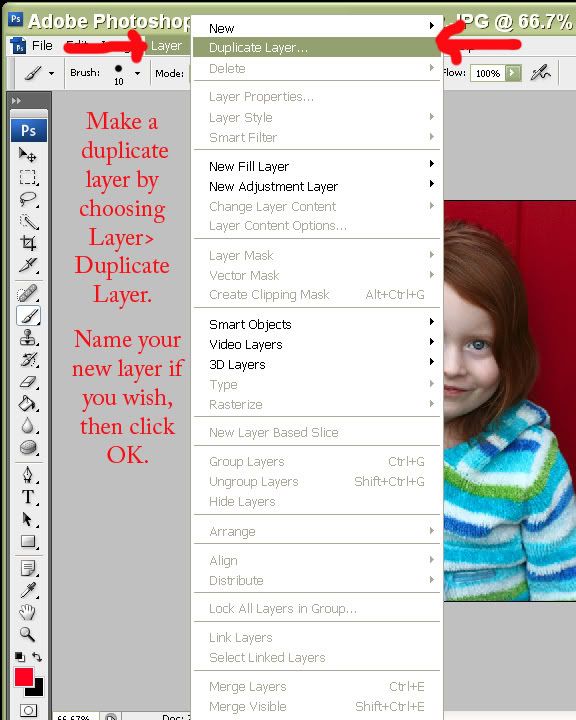
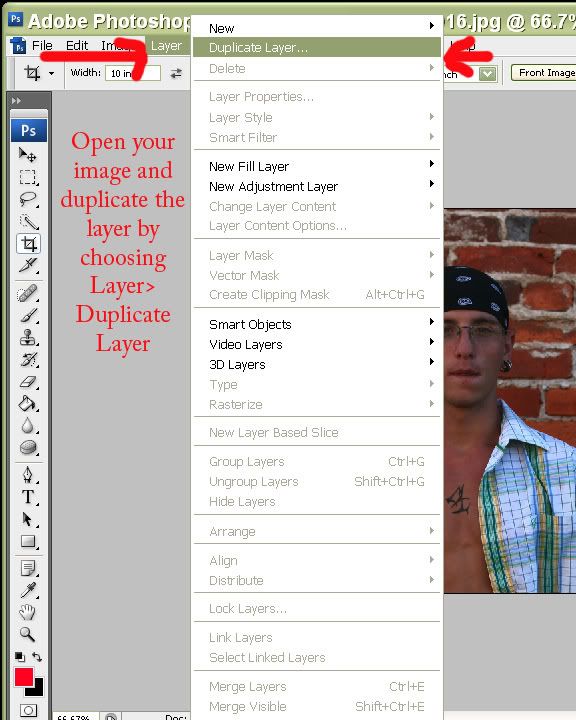
Step 1: Open the image that needs correction. As you can see, this photo has a strong pink cast (from my dd's pink curtains). Click the icon at the bottom of the layers palette to create a new blank layer.

Photobucket

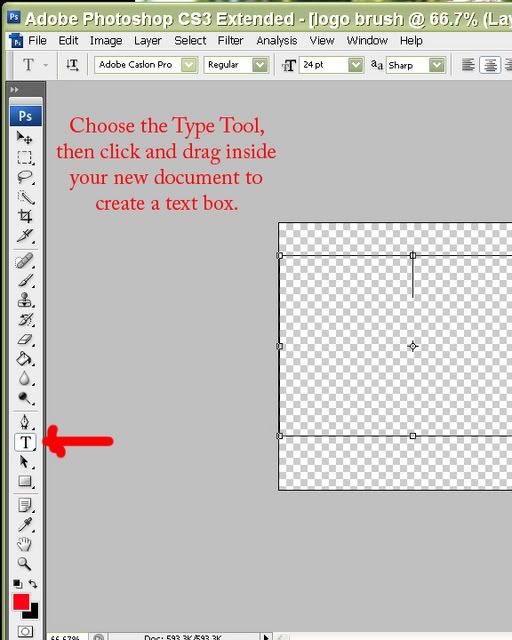
Step 2: Click on the rectangular marquee tool and hit Ctrl+A (Cmd+A on a Mac) to select the entire photo.

Photobucket

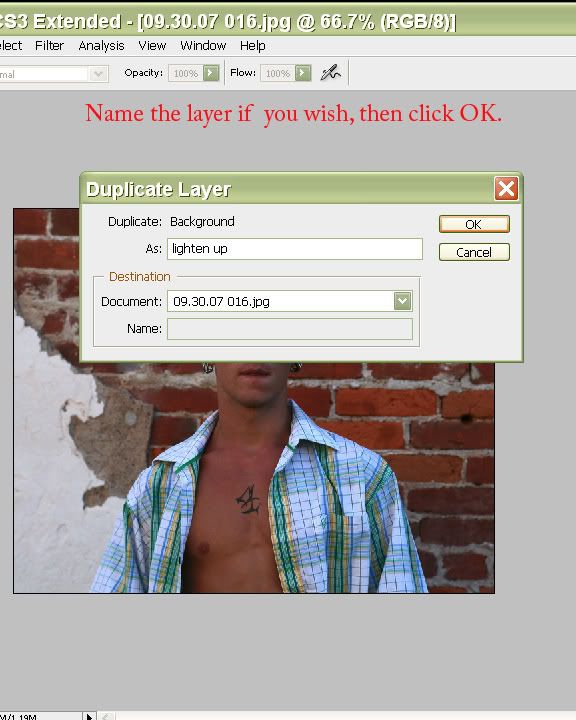
Step 3: Right-click inside the selected area, choose "Fill" and choose "50% gray" from the drop-down. This will (you guessed it) fill your layer in with 50% gray.


Photobucket

Photobucket

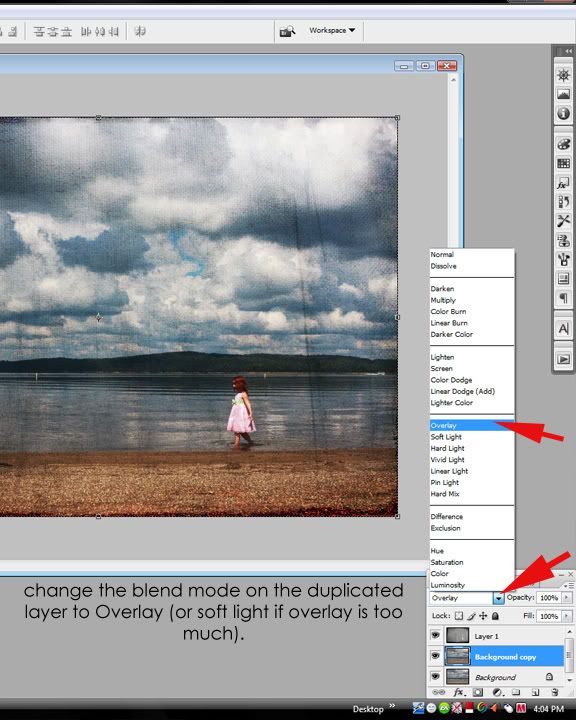
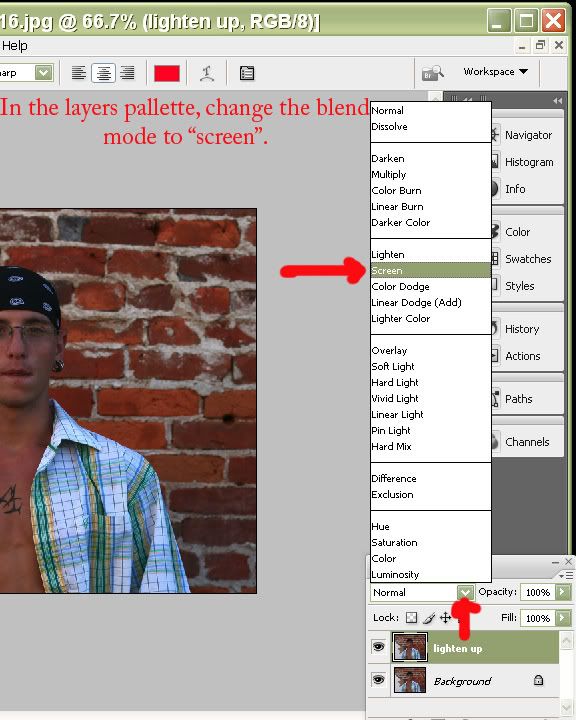
Step 4: Change the blend mode on the gray layer to Difference. This of course does absolutely NOTHING good for your photo but don't worry, it's only temporary!

Photobucket

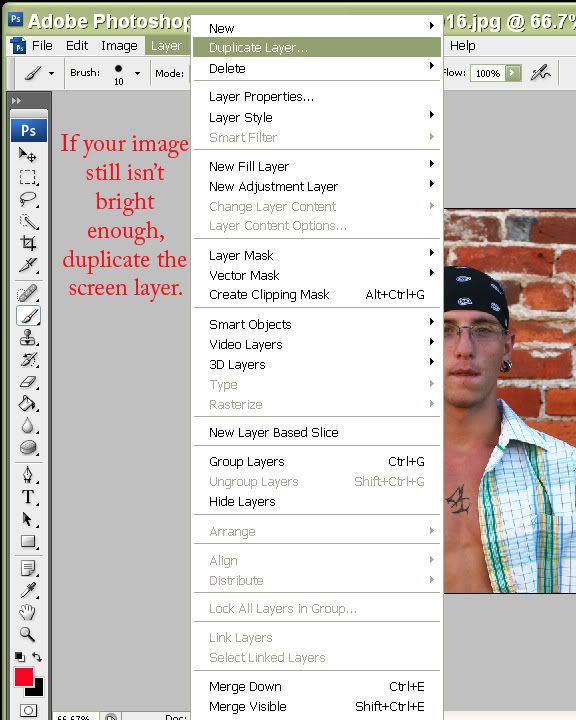
Step 5: Click the icon at the bottom of the layers palette that looks like a half black/half white circle (create new fill/adjustment layer) and choose "Threshold" from the menu.

Photobucket

Step 6: Slide the slider under the histogram in the Threshold box that pops up all the way to the left (this will make everything white), then slowly move the slider back to the right. The first areas that turn black as you move the slider back to the right are the midtone grays.

Photobucket

Step 7: Now we will mark a neutral gray spot so we can remember where it was. Choose the color sampler eyedropper from the tool palette (it is under the regular eyedropper). Make sure "3x3 average" is chosen at the top of the screen too. Then click your dropper directly on your photo on one of the black spots you revealed with the Threshold layer. This puts a little "marker" on the spot (don't worry, it will go away after you are done), it's just to remind you where the gray is.

Photobucket

Step 8: Holding down your Ctrl (or Cmd) key, click to highlight both the threshold layer and the gray fill layer and then click the trash can icon in the layers palette to delete them. They have served their purposes and we are done with them now.
Photobucket

Step 9: Go into Curves (Ctrl or Cmd + M) and choose the middle gray eyedropper. Now click on the spot on your photo where you marked the midtone gray earlier. Voila! Like magic the color cast disappears and the colors are MUCH more realistic and accurate now!

Photobucket

If you are using Elements and don't have Curves, you can also do the last step in Levels (Ctrl or Cmd + L) and use the gray eyedropper there.

Photobucket

I know it sounds like a lot of steps but honestly once you've done it a time or two it goes really quickly

Tuesday, September 23, 2008

adding a texture to a photo

Textures are cool, fun, and can take an otherwise "blah" photo and turn it into a work of art! Beware, they are addicting! ;)

Photobucket

Photobucket

Photobucket

Photobucket

Photobucket

Photobucket

Photobucket

Happy texturizing! :)

Sunday, August 24, 2008

Creating a patterned background using brushes

There are SO MANY cool things you can do with brushes! Including making your own patterned papers to use in digiscrapping, making cards, photobooks, storyboards... the possibilites are only limited by your imagination!

Here is a quick & dirty tutorial on how to make a patterned paper, using Sharon's beautiful damask brushes she so generously shared on 2peas.

Photobucket

Photobucket

Photobucket

Photobucket

Photobucket

Saturday, February 16, 2008

Selective color (or, how to turn a photo b&w and keep one area in color)

There are several ways to actually do this, but I'm going to post the way I know is compatible with both full photoshop and photoshop elements. :)

Open the photo you wish to do selective color on.

Duplicate the layer by choosing Layer>Duplicate.
Photobucket

No need to name the layer, but you can if you want, and click OK.

Go into Image>Adjustments>Gradient Map.

Photobucket

Choose the Black/White gradient. This will turn your entire photo b&w but don't worry! We'll bring the color back in the next step!

Photobucket

Now select your Eraser tool. Adjust the size according to the area you wish to bring the color back on. I set the hardness of the eraser to 0 and I usually lower the opacity of the eraser (at the top of the page) to around 50% because bringing back 100% of the color is usually "too much", but it's up to you and your taste!

Photobucket

Start erasing over the area of the photo you wish to return to color (I normally zoom in while I do this to be more accurate). Take your time, it's a bit tedious but if you take your time and be more precise it will look much better!

Photobucket

Once you are done erasing and you are happy with how it looks, just flatten your image and save!

Photobucket

Tuesday, October 30, 2007

How to make a logo brush/ watermark brush/ copyright stamp

Whatever you want to call it! LOL!

Photo Sharing and Video Hosting at Photobucket

Photo Sharing and Video Hosting at Photobucket

Photo Sharing and Video Hosting at Photobucket

Photo Sharing and Video Hosting at Photobucket

Photo Sharing and Video Hosting at Photobucket

Photo Sharing and Video Hosting at Photobucket

Photo Sharing and Video Hosting at Photobucket

Photo Sharing and Video Hosting at Photobucket

To use your new logo/watermark/copyright brush, just choose that brush from your brush pallette, change the opacity at the top of the screen (if you wish), adjust the brush size, and click on your photo to "stamp" your logo on!

Tuesday, October 16, 2007

A basic resize and sharpen for web tutorial

Photo Sharing and Video Hosting at Photobucket

Photo Sharing and Video Hosting at Photobucket

Photo Sharing and Video Hosting at Photobucket

Photo Sharing and Video Hosting at Photobucket

Photo Sharing and Video Hosting at Photobucket

Photo Sharing and Video Hosting at Photobucket

Photo Sharing and Video Hosting at Photobucket

Basic underexposed photo fix tutorial

Photo Sharing and Video Hosting at Photobucket

Photo Sharing and Video Hosting at Photobucket

Photo Sharing and Video Hosting at Photobucket

Photo Sharing and Video Hosting at Photobucket

Photo Sharing and Video Hosting at Photobucket

Photo Sharing and Video Hosting at Photobucket

**TIP!**
This same basic principle applies to fixing slightly overexposed photos too! Instead of changing the blend mode to "screen", try changing it to "multiply"! :c)